Important Step
When replacing a ball joint, the stud nut must be torqued to the proper specification. Being too loose or over-torqued can lead to stud breakage and damage to the steering knuckle. Also, If the nut is too loose, it can cause the same symptoms as a failed ball joint, which may lead to unnecessary replacement. Read on to learn an important tip for torquing the stud nut on a MOOG® ball joint and check out this video to learn more.
Always Check for Proper Stud Fitment
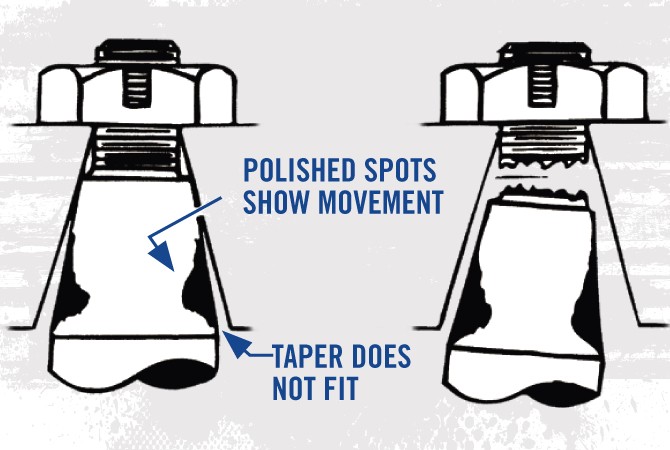
Before removing the old ball joint, make sure the stud is firmly seated in the tapered hole of the steering knuckle. If the old ball joint was loose in the steering knuckle, or if any out-of-roundness, deformation, or damage is observed, the steering knuckle must be replaced.
Damaged or worn steering knuckles will result in premature failure even if you install a new ball joint. The ball joint stud must have a secure fit to the knuckle; if the stud rocks in the taper it could lead to stud failure and loss of steering ability and vehicle control.

Getting Started
When installing a new MOOG ball joint, always refer to the procedures and specifications listed in the OE repair manual. If a MOOG part necessitates a special procedure, installation instructions will be provided.
Torquing Procedure
To properly install a new ball joint:
- STEP 1
Clean the steering knuckle tapered hole. Test fit the new ball joint by hand to check the fit of the stud taper to the knuckle. The stud should seat firmly without rocking, and only the threads of the stud should extend through the steering knuckle. If this is not the case, it’s likely that the steering knuckle is worn and needs replacement. - STEP 2
Secure dust boot and/or retaining ring (as applicable). - STEP 3
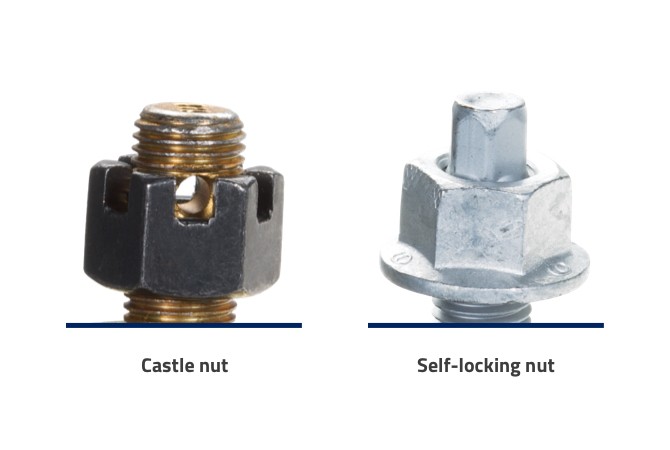
Insert the stud of the new ball joint through the tapered hole of the knuckle and install either self-locking nut (self-locking nuts must always be replaced) or the slotted nut (also known as a castle nut) as supplied. Thread the nut on by hand until it stops, making sure it threads evenly and smoothly.

- STEP 4
Using a hand torque wrench, torque to the specification listed in the repair manual or, if applicable, to the specification listed on the MOOG instruction sheet supplied with the part.
For Applications Using a Castle Nut
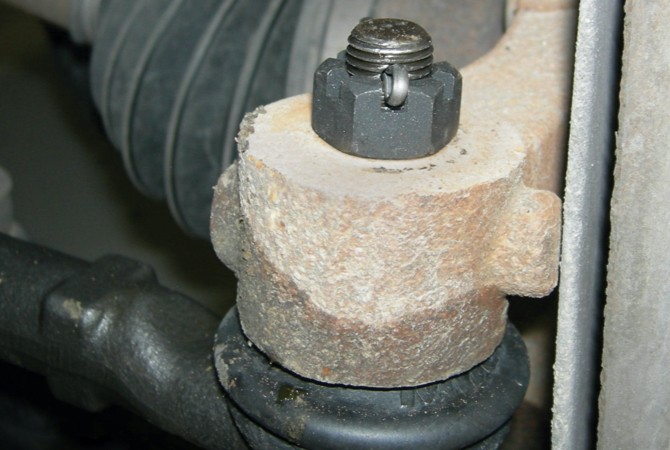
If the castle nut does not align with the hole in the stud when the specified torque is reached, tighten the nut to the next slot, then install the supplied cotter pin. Never loosen the nut to align it with the stud.

Learn more about premium steering and suspension parts, find your car part, or find where to buy your auto part today.
The content contained in this article is for informational purposes only and should not be used in lieu of seeking professional advice from a certified technician or mechanic. We encourage you to consult with a certified technician or mechanic if you have specific questions or concerns relating to any of the topics covered herein. Under no circumstances will we be liable for any loss or damage caused by your reliance on any content.